FAQ Kaleidoscope24.com
Welcome to Kaleidoscope24.com, the online platform that connects you with online kaleidoscope makers from around the world. Here are some frequently asked questions about our service.
FAQ: How can I insert my photos and images for kaleidoscopes?
Q: How can I insert my photos and images for kaleidoscopes?
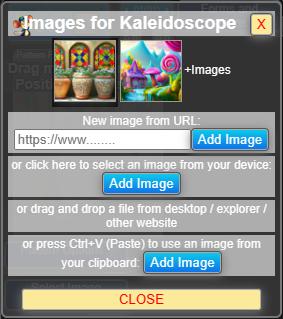
A: You have several options to insert photos and images for creating kaleidoscopes:
1. New Image from URL:
- If you want to use an image from another website, you can enter the URL of the image in the "New Image from URL" field and click "Load." The image will be used as the source for the kaleidoscope. You can use any valid URL that points to an image, for example: https://www.example.com/image.jpg
2. Or Click Here to Select an Image from Your Device:
- If you prefer to use an image from your own device, click the "Or Click Here to Select an Image from Your Device" button. A window will open where you can choose a file from your computer or smartphone. The selected image will be uploaded and used as the source for the kaleidoscope. You can use image files in JPG, PNG, WEBP, or GIF formats.
3. Or Drag and Drop a File from Your Desktop/Explorer:
- If you're using a desktop computer or laptop, you can also simply drag and drop an image file onto the kaleidoscope. The image will be automatically uploaded and used as the source for the kaleidoscope. This is a quick and easy way to use your own images.
4. Or Press Ctrl+V (Paste) to Use an Image from Your Clipboard:
- If you've copied an image from another application, such as a web browser or image editing program, you can also paste it into the kaleidoscope using the keyboard shortcut Ctrl+V (Paste). The image will be taken from your clipboard and used as the source for the kaleidoscope. This is a convenient way to combine images from various sources.
You can either upload an image or use a webcam or camera to take a photo. The tool will then transform your image into a kaleidoscope by reflecting it multiple times.
Additionally, it seamlessly integrates with your device's native functionalities, allowing you to share images via the OS's share menu using the Web Share Target API and open them directly from Data Explorer using the Launch Handler API.
FAQ: How can I change Kaleidoscope shapes and save my designs?
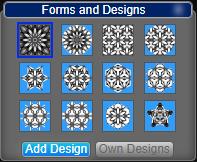
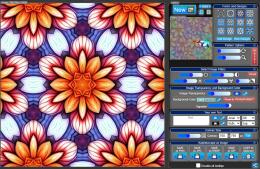
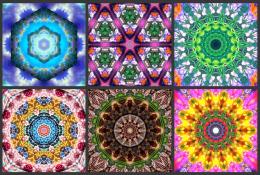
Kaleidoscope Shapes and Varieties: Kaleidoscope24 offers you a variety of different kaleidoscope shapes that you can change with a single click on the buttons under "Kaleidoscope Forms" You can choose between a rectangle, a circle, or a selection of nine other shapes such as a hexagon, a six-pointed star, a kisrhombille, and more. Creating a classic kaleidoscope or mandala is easy here.
Saving and Editing Designs: With this app, you can create beautiful and unique kaleidoscopes from your own photos. You can choose from various shapes and patterns to customize your kaleidoscope segments individually. You can also change the size, number, and orientation of segments to achieve different effects. You can save your kaleidoscope designs as templates and edit them later. To save, click on "Add Designs" and to insert or delete, click on "Own Designs".
FAQ: How can I enhance or modify my photo or image, such as colors?
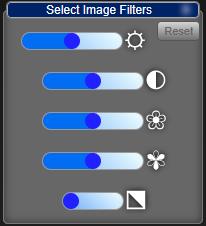
You can adjust and enhance the image or photo for kaleidoscopes using the following tools: Brightness, Contrast, Color Saturation, Shift Hue of Color and Negative Image Colors. These tools are located on the right side of the screen and are easy to use with sliders. Here are some examples of the effects of these tools:
-
Brightness: This slider increases or decreases the brightness of the image. Sliding it to the right makes the image brighter, while sliding it to the left makes it darker.
-
Contrast: This slider increases or decreases the contrast between the bright and dark areas of the image. Sliding it to the right makes the bright areas brighter and the dark areas darker, resulting in a sharper image. Sliding it to the left makes the bright and dark areas more similar, leading to a flatter image.
-
Color Saturation: This slider increases or decreases the intensity of colors in the image. Sliding it to the right makes the colors more vibrant and vivid, while sliding it to the left makes them paler and grayer.
-
Shift Hue of Color: This slider changes the overall hue of the entire image. Sliding it to the right or left shifts all colors in the image by a certain degree, resulting in a completely different color scheme.
-
Negative Image Colors: This button inverts the colors of the image. In other words, bright areas become dark, and dark areas become bright. This can create an interesting effect, especially with high-contrast images.
FAQ: How can I determine transparency for my photos, for example, for a specific color?
A special feature is the ability to change the transparency of the image. When you enable this option under "Image Transparency" you can choose a color to make transparent. You can then adjust the transparency strength using the slider. This can create interesting effects by making parts of the image disappear or become see-through.
FAQ: How can I customize the background color of your kaleidoscope?
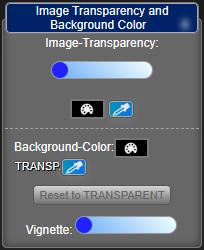
Question: How can I customize the background color of your kaleidoscope?
Answer: To customize the background color of your kaleidoscope, follow these steps:
Step 1: Locate the "Background Color" option in the "Options" menu on the right side of the screen.
Step 2: Click on it, and a color palette will appear, allowing you to choose any color for the background of your kaleidoscope.
Step 3: You can also adjust the brightness and contrast of the color by moving the sliders located beneath the color palette.
Step 4: Another way to enhance your kaleidoscope's background is by using the Vignette effect. The Vignette effect darkens the edges of the image, creating focus on the center.
Step 5: You can also adjust the strength of the Vignette effect by moving the slider.
Note: If you wish to change the color or the Vignette effect of your background at any time, you can do so by selecting a different color or adjusting the sliders. However, if you want to restore the original transparent background of your kaleidoscope, simply click the "Reset to TRANSPARENT" button under the color palette. This will remove the color and Vignette effect from your background, returning your kaleidoscope to its original state.
FAQ: How can I write and format my own text?
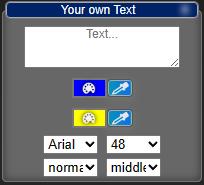
Q: How can I use custom text to transform images into greeting cards, invitations, or memes?
A: You can easily transform any image into a greeting card, invitation, or meme using custom text. Here's how:
-
Customize Text Appearance: You have the flexibility to adjust the look of your text with various options.
- Choose from a wide range of colors to fill your text or outline it using the color picker or the Pipette / EyeDropper API.
- Select any font installed on your device using the Local Fonts Access API.
- Adjust the font size to suit your needs.
- Format your text as bold or italic to make it stand out.
-
Position Your Text: You can position your text in three different ways:
- Top: Place the text at the top of your image.
- Center: Center-align your text for a balanced appearance.
- Bottom: Position the text at the bottom of the image.
With these options, you can create customized and visually appealing text for your projects.
FAQ: How can I resize an image?

Image Dimensions for Saving:
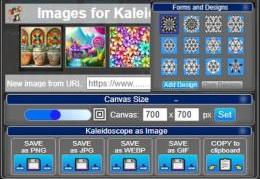
One of the features of this image editing tool is the ability to resize images according to your preferences. You can use the sliders to change the image dimensions from 50x50 px to 1500x1500 px in a square format, or you can manually input values to create a portrait or landscape orientation.
Canvas for Preview:
The canvas is automatically adjusted to fit the visible browser window. The relative size is always displayed as a percentage. For example: "Canvas: 700x700 px (75%)".
This feature provides you with more flexibility and control over how your images appear on various platforms and devices.
FAQ: How can I save the kaleidoscopes I create, and in what file formats?
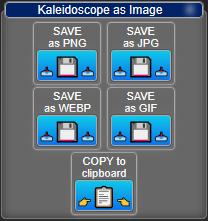
You can preview how your kaleidoscope looks before saving it. Once you're satisfied with your kaleidoscope, you can save or copy it in various formats. Here are the options available:
- SAVE AS PNG - Click on this option to save the image with transparency as a PNG file. Please note that this might result in a large file size.
- SAVE AS JPG - Click here to save the image without transparency as a smaller JPG file.
- SAVE AS WEBP - Click here to save the image with transparency as a WEBP file, which has a smaller file size but may have limited compatibility.
- SAVE AS GIF - Click here to save the image with transparency as a static or animated GIF file. This option will open a new window with settings.
- COPY to clipboard - Copies an image with transparency to the clipboard.
You can use your saved or copied kaleidoscopes for various purposes, such as a wallpaper, decoration, or as a gift. I hope this blog post helps you create your own kaleidoscopes online. Have fun experimenting!
Keyboard Shortcuts for Pattern Control, Zoom, Rotation, and Fullscreen Mode
These keyboard shortcuts provide flexible control over pattern position, zoom, rotation, and fullscreen modes.
- Pattern Control: Activate with the "P" key and move using the arrow keys (top, bottom, left and right).
- Zoom: Activate with the "Z" key and adjust using the arrow keys.
- Rotation: Activate with the "R" key and rotate using the arrow keys.
- Adjust Speed: Use the "1-5" keys to increase speed.
- Exit: Press the "Q" key to quit.
- Fullscreen Mode:
- "F" key for page fullscreen mode (hides header and options).
- "F11" key for browser fullscreen mode.
- Exit with "Q", "ESC", or "F11".
